

Replacing factory pieces with dodge ram 1500 aftermarket parts usually costs 20% to 40% less than buying from a dealer, and the work takes between one and four hours for bolt-on items. This guide covers fitment rules, the install order that saves time, and the limits you’ll hit with emissions or warranty checks.
What aftermarket parts for a Dodge Ram actually are

Aftermarket components are built by companies other than the original maker. Use them to fix wear, change looks, or add features. They fit accesorios para dodge ram 1500 slots from the Dodge-badged era through current builds.
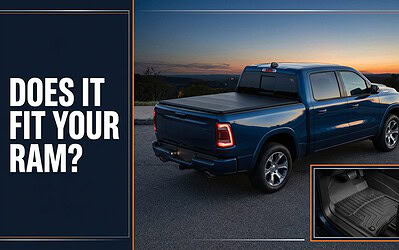
The wrong idea people bring here is that every third-party piece fits perfectly out of the box. It doesn’t. A 2019 part won’t line up on a 2013 frame because mounting points changed. Check fourth-generation specs for pre-2019 trucks and fifth-generation for newer ones. Match the exact cab size and bed length before buying.
How to install bolt-on Ram truck accessories
Follow a strict install order to maintain access. Do underbody work first, then exterior trim.
- Park the truck on flat concrete and set wheel chocks behind the rear tires before lifting anything.
- Disconnect the negative battery terminal and wait 10 minutes if your new ram accessory plugs into any wiring harness.
- Remove the old component using the socket size listed in your repair manual—usually 10mm, 13mm, or 15mm for exterior bolts.
- Clean the bare mounting surface with a wax and grease remover so the new gasket seals tight against the metal.
- Hold the new piece in place without tightening, thread every bolt by hand first, then torque them in a star pattern to the spec printed on the box.
- Reconnect the battery and cycle the ignition twice without starting the engine to let the modules recognize the change.
- Start the truck and listen for exhaust leaks or rattles at idle for three full minutes.
Take the truck to an alignment shop after swapping suspension or steering. Know when to use thread locker versus anti-seize. Use blue thread locker on vibration-prone spots and anti-seize on exhaust hardware.
Fitment numbers for common upgrades
These settings assume a standard 1500 crew cab with a 5-foot-7-inch bed. If you have the 6-foot-4-inch bed, tonneau rails sit further back, and running boards need the extended bracket kit.
| Situation | What to use | How long | What to watch for |
|---|---|---|---|
| Bed cover swap | Clamp-on tonneau rail kit | 45 minutes | Rail alignment with bulkhead seal |
| Side step install | Frame-mounted running boards | 2 hours per side | Rocker panel clearance at full compression |
| Cold air intake | Sealed filter box kit | 1 hour | MAF sensor seating inside the tube |
| LED light bar | Relay harness with switch | 1.5 hours | Ground wire attached to bare chassis metal |
| Cat-back exhaust | Mandrel-bent tubing system | 3 hours | Hanger rubber isolators lined up evenly |
| Tow mirror swap | Plug-and-play glass assembly | 20 minutes | Blind spot module connector seated fully |
Getting the fitment right on the first try
The difference between a clean install and a frustrating afternoon comes down to preparation. Lay out every bolt, bracket, and spacer on a magnetic tray before you touch the truck. Grouping hardware by step stops you from threading a metric bolt into an imperial hole, which strips the threads and forces you to drill and tap a new mount.
Read the actual payload sticker on your driver’s door jamb. The payload capacity printed there tells you exactly how much extra weight your specific truck can carry before the rear springs sag. A half-ton rated setup handles basic bumpers fine, but if you add a winch plate and heavy steel guards, you’ll exceed that limit and need upgraded front coils to keep the nose level.
Troubleshooting installation problems
When a new piece doesn’t behave the way the old one did, the cause is almost always in the mounting or the wiring. Check these signs before you pull everything apart again.
| What you notice | What it usually means | What to do first |
|---|---|---|
| Rattling over bumps at low speed | Bracket bolts haven’t reached torque spec | Retorque all fasteners in a crisscross pattern |
| Check engine light turns on immediately | Mass airflow sensor unplugged or loose | Reseat the sensor clip until it clicks twice |
| Water pooling in the bed corners | Tonneau rail shifted during final tightening | Loosen clamps, push rail forward, retighten |
| Lights flicker when hitting the brakes | Ground wire sharing a circuit with tail lamps | Run a dedicated ground to the frame rail |
| Door won’t latch shut smoothly | Fender flare pushing against the striker plate | Shim the flare out 2mm with washers |
Emissions rules and warranty limits
Swapping components touches legal lines you need to know about. Under the Clean Air Act, the EPA prohibits removing or defeating factory emissions controls on vehicles driven on public roads. That means deleting the catalytic converter or installing an unapproved tune voids your compliance, regardless of what the seller claims.
Changing suspension or cosmetic trim doesn’t automatically kill your factory warranty. But if a non-approved lift kit causes your driveshaft to fail, the dealer will deny that specific claim under the Magnuson-Moss Warranty Act. Keep every receipt and note the date you installed each piece. If you plan to weld frame mounts or cut structural crossmembers, leave that to a certified fabricator. Doing it yourself risks cracking the frame under load.
Keeping your upgrades working
Once the wrenches are put away, the real work is keeping the new hardware tight and clean. Wash off road salt from undercarriage armor every two weeks during winter.
Check the torque on suspension bolts after the first 500 miles of driving.
If you added electrical accessories, inspect the relay connections annually. Vibration works spade connectors loose over time. A loose connection creates resistance, which generates heat and eventually melts the plastic plug housing.
When this approach is the wrong choice

Not every problem needs a catalog solution. The damage might be a bent subframe, and bolting new parts onto a twisted base just accelerates tire wear.
If you need commercial-grade towing beyond the factory rating, don’t rely on bolt-on hitches alone. You’ll need a fifth-wheel prep package installed by a shop that can certify the frame reinforcement.
Frequently asked questions
Can I install a cold air intake without tuning?
Yes, you can run a basic drop-in filter or sealed box without a tune. However, open-element intakes change the air density reading enough that the factory computer might pull timing. If you use an open filter, a baseline tune keeps the engine running safely.
Why does my check engine light come on after swapping parts?
It happens because a sensor was left unplugged or a vacuum line cracked during removal. The most common trigger is the mass airflow sensor not clicking fully into its housing. Clear the code with a scanner after double-checking every connector you touched.
How long does a full bolt-on bumper swap take?
Expect 3 to 4 hours for a steel front bumper on a level driveway. This assumes you have a floor jack supporting the new bumper while you align the frame bolts. If your truck has parking sensors in the old bumper, add an hour to transfer the sensors and connect them to the existing harness.
Is it safe to use cheaper brake pads from third parties?
Only if they meet SAE or OEM friction standards printed on the box. Cheap pads without proper testing fade under heavy loads, which is dangerous for a truck that weighs over 5,000 pounds. Never compromise stopping power to save money on consumables.
What happens if I remove the catalytic converter?
You’ll fail state inspections in areas that test emissions, and it violates federal law for street-driven vehicles. The truck will also throw oxygen sensor codes constantly because the downstream sensor expects filtered exhaust gas. Leave the emissions hardware intact.
How much weight can aftermarket running boards hold?
Most nerf bars and running boards support 300 to 500 pounds per side when bolted directly to the frame. Cab-length boards mounted only to rocker panel sheet metal hold significantly less. Check the manufacturer’s stamped rating before stepping on them with heavy boots.
Conclusion
Picking the right components comes down to matching your truck’s exact generation and respecting the physical limits of the frame. Read the torque specs, verify your door jamb sticker, and don’t rush the wiring. A slow, methodical install holds up for years, while rushing through the steps leaves you chasing rattles down the road.








0 Comments